
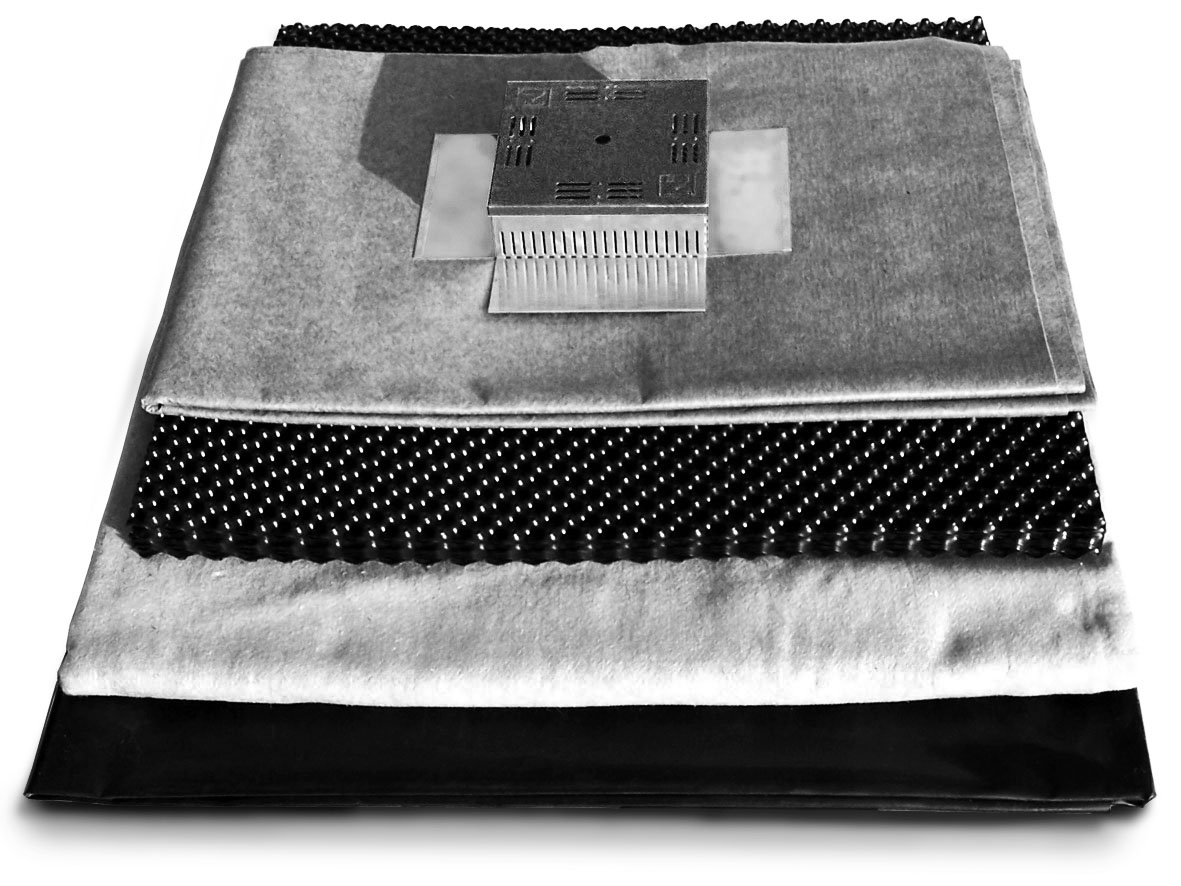
Zinco DIY Set for Garages, for 18 m², without System Substrate
Greening package for garages, carports, etc. up to approx. 18 m² in size or a multiple thereof. Based on the proven system with Floradrain® FD 25.
for roof sizes up to 3 x 6 m, package size 1.0 x 1.0 x 0.2 m, weight approx. 40 kg. Contents: 20 m² Root Barrier WSF 40, 20 m² Protection Mat TSM 32, 18 m² drainage element Floradrain FD 25, 20 m² Filter Sheet SF, 1 foldable Inspection Chamber, 0.5 kg seed mixture "Bee Pasture".
| Order Nr.: | 3800 |
|---|---|
| Length [m]: | 1,0 |
| Width [m]: | 1,0 |
| Height [mm]: | 200,0 |
| Packaging unit: | Package |
| Weight [kg]: | 40,0 |
When working on green roofs, you should never forget that you are on a roof! It is therefore in your own interest to ensure that you have fall protection in the form of scaffolding, railings or safety harnesses.
Cleaning the waterproofing of the roof:
Before starting the actual greening work, any gravel / grit must first be removed and the roof surface swept clean. If there is a gravel trap, it must be removed. If any damage to the waterproofing of the roof comes to light during this work, please have it repaired by a specialist waterproofing company.
The layer sequence of the system structure:
6 Plant community "Bee Pasture"
5 System Substrate "Rockery Type Plants"
4 Filter Sheet
3 Drainage element Floradrain® FD 25
2 Protection Mat
1 RootBarrier
1 Laying the Root Barrier (black foil):
Cover the roof surface completely with this and run the foil up the edges and slide it under the sheet metal cover. If there is no cover or if it will be fitted later, leave approx. 100 mm of the foil sticking up at the edge.
After completing the entire construction, carefully cut the Root Barrier flush with the top edge of the substrate without damaging the waterproofing of the roof. The Root Barrier is folded in at the corners. Cut a circular opening 10 mm smaller in diameter than the outlet above the roof outlet. The Inspection Chamber will be fitted onto this later. If you require several pieces of Root Barrier, please ensure sufficient overlapping of approx. 1.5 m. Secure the overlapping area against slippage with a width of adhesive tape.
ATTENTION: The Root Barrier does not replace the waterproofing of the roof.
2 Protection Mat (3 mm thick, carpet-like mat):
First cut the Protection Mat so that the corresponding pieces overlap approx. 50 to 100 mm after installation. During subsequent (loose) installation, ensure that the Protection Mat is also laid up the edge of the roof and cut a hole in the Protection Mat for the outlet (like Root Barrier).
3 Floradrain® elements:
Depending on the size of the roof, the elements can either be laid butt-jointed or with some overlapping on the Protection Mat. Make absolutely sure that the openings for diffusion in the "humps" point upwards (see picture at the top). A corresponding hole must also be cut out above the roof outlet on the drainage element.
4 Filter Sheet (thin fabric fleece):
Lay the Membrane on the drainage elements so that it covers them completely. Again, cut a hole above the outlet.
Construction and fitting of the Inspection Chamber:
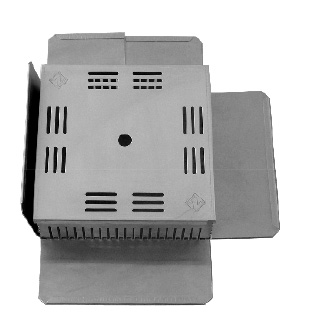
In the 1st step, bendthe sheet metal blank in an "L" shape so that the fold is at the top and subsequently points inwards. The wider side (without spades) will later form the base flange.
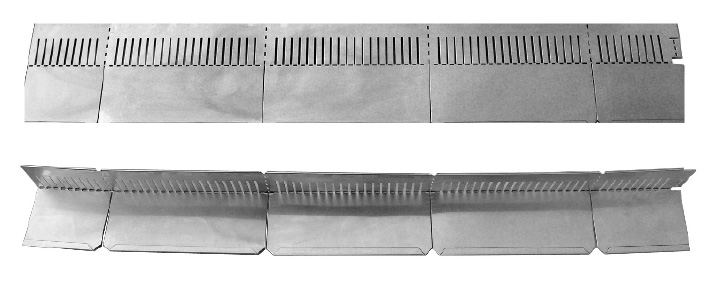
Then bend the blank at the perforations to form a square.
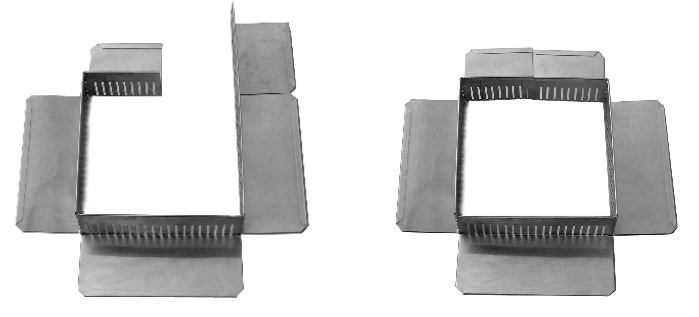
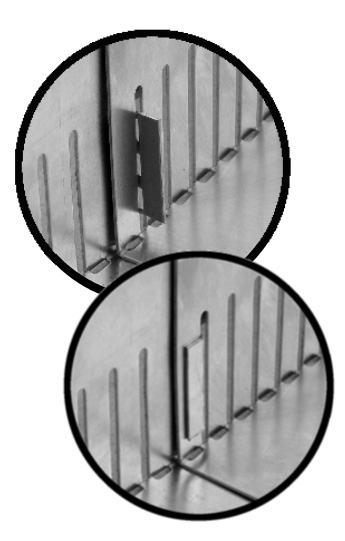
To close and fix the Inspection Chamber, insert the approx. 30 mm wide strip at the end of the blank through the first slit on the opposite side and fold it over.
If the outlet is on the edge or in the corner, one flange or two flanges can be bent upwards. The attached cover, lid gives the resulting Inspection Chamber stability. It is now simply placed loosely over the outlet and the cut-out layers.
Gravel strips:
Now spread the gravel (approx. two 10-litre buckets per linear meter of edge) as a 200 to 300 mm wide strip around the edge and around the Inspection Chamber.
5 System Substrate "Rockery Type Plants":
The System Substrate "Rockery Type Plants" is spread evenly over the System Substrate fleece at a height of 60-80 mm. For design reasons and to increase the species richness, mounds are of course also possible.
6 Spreading the seed mixture:
The "Bee Pasture" seed mixture included in the package is spread with glue and other additives so that it can be spread evenly by hand over the Area to be greened. After sowing, the seed should be raked in very lightly; the Area should then be rolled or pressed down and watered thoroughly without causing erosion. The Area should no longer be walked on. Initial watering for the first 6-8 weeks ensures the success of the seeding. The hot summer months should be avoided.
Maintenance measures:
Emerging woody seedlings and other undesirable plants should be removed in good time. In order to achieve and maintain a stand that is as species-rich as possible, regulatory intervention may also be necessary, e.g. to contain species that are spreading more rapidly. Timely annual mowing, at the latest before new shoots appear, with removal of the cuttings, ensures that the plant species can sprout well again and that weaker species also receive enough light again.