
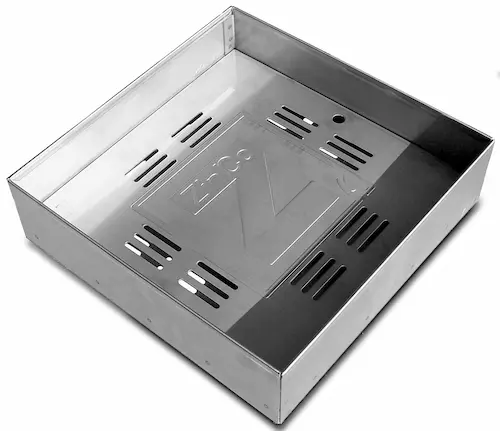
Zinco extension piece KSA 20/40 Height 20 cm, for KS 10/40
Extension piece for KS 10/40.
for Inspection Chamber KS 10/40 via retention throttle RD 28, outer dimension of the chamber approx. 40 x 40 cm, galvanized and laminated / plastic-coated sheet steel, antique silver, weight approx. 3 kg/each
| Order Nr.: | 4013 |
|---|---|
| Colour: | antique silver antique |
| Material: | Galvanized steel and plastic-coated |
| Height [mm]: | 200 |
| Packaging unit: | Piece |
| Weight [kg]: | 3,0 |
| Outer dimension of the chamber [mm]: | 400 x 400 |
Height 20 cm, outer dimension of the chamber 40 x 40 cm, galvanized and laminated / plastic-coated sheet steel, Colour antique silver, for the gradual raising of the "KS 10/40" Inspection Chamber, supply and install according to manufacturer's instructions.
Product: Zinco extension piece "KSA 10/40"
Unit: pcs
Order Nr.: 4013
Inspection Chambers protect outlets from contamination and ensure easy access for inspection and maintenance.
Installation of Inspection Chamber:
Before installation, the flanges of the Inspection Chamber must be pulled out in the direction of the arrow until they click into place. An Inspection Chamber is then placed above each roof outlet, usually directly on the drainage element. All layers in the diameter of the outlet are cut out beforehand. A cross cut is not sufficient for this.
The Filter Sheet is laid over the Inspection Chamber and cut out so that the slots of the Inspection Chamber remain free, but the two flanges are covered. Size of the opening to be cut out approx. 300 mm × 300 mm.
For single-layer greening, the Inspection Chamber is laid directly on the protective mat.
If extension pieces (KSA 8/30 or KSA 20/30) are used, the cover, lid or metal grate/grid of the Inspection Chamber is removed for installation, the required number of extension pieces are fitted and the cover, lid or metal grate/grid is placed back on the Inspection Chamber (max. height approx. 600 mm). As an alternative to the slotted cover, the fillable or greenable lid (ArtAfter inserting the cover, lid and tightening the screws, fill in the System Substrate / Substrate Soil / Growing Medium and insert the vegetation if necessary.
A gravel strip approx. 300 mm wide is placed around the Inspection Chamber. This prevents slippage and the ingrowth of plants and provides a visual marker.
It is advisable to apply the gravel / grit before the System Substrate / Substrate Soil / Growing Medium. When applying the gravel, the shaft can be covered with a piece of Filter Sheet to prevent debris and damage to the cover, lid.
During subsequent work, care must be taken to ensure that the Inspection Chamber is not displaced and remains in position above the roof outlet.
Installation of interlocks / locking set (only possible for Inspection Chamber with cover, lid):
When using an interlocks / locking set, this is installed in the finger holes of the cover, lid. To do this, the nuts on the back of the locking mechanism are unscrewed, the locks are inserted from above through the respective hole and aligned so that the quarter-turn of the locking mechanism grips the edge of the Inspection Chamber. Finally, the nuts are refitted from the underside of the cover, lid and tightened.
Maintenance:
The Inspection Chamber should be opened regularly as part of the greening maintenance and the outlet underneath checked. Debris must be removed to ensure proper functioning.
This product is also available in other dimensions / measurements / specifications

Extension piece for KS 10/40.

Extension piece for KS 10/40.
Extension piece for KS 10/40.

Extension piece for KS 10/40.

Extension piece for KS 10/40.
This product is accessories from

Extension piece for KS 10/40.

Extension piece for KS 10/40.